Basic Memory Cloud
Cloud remote MCP setup and command line tools for Basic Memory Cloud
Basic Memory Cloud provides hosted MCP access with no local installation required. Bring your knowledge to the cloud - all your existing notes, connections, and context accessible from anywhere.
Why use Basic Memory Cloud?
- Access from any device
- Easily import your data
- 2-minute setup
- Local sync optional
- OAuth authentication
Setup with Claude
Basic Memory Cloud uses Remote MCP to connect to AI assistants. The connection URL is:
https://cloud.basicmemory.com/mcpOpen Claude Settings
In Claude Web or Desktop, go to Settings → Claude → Connectors
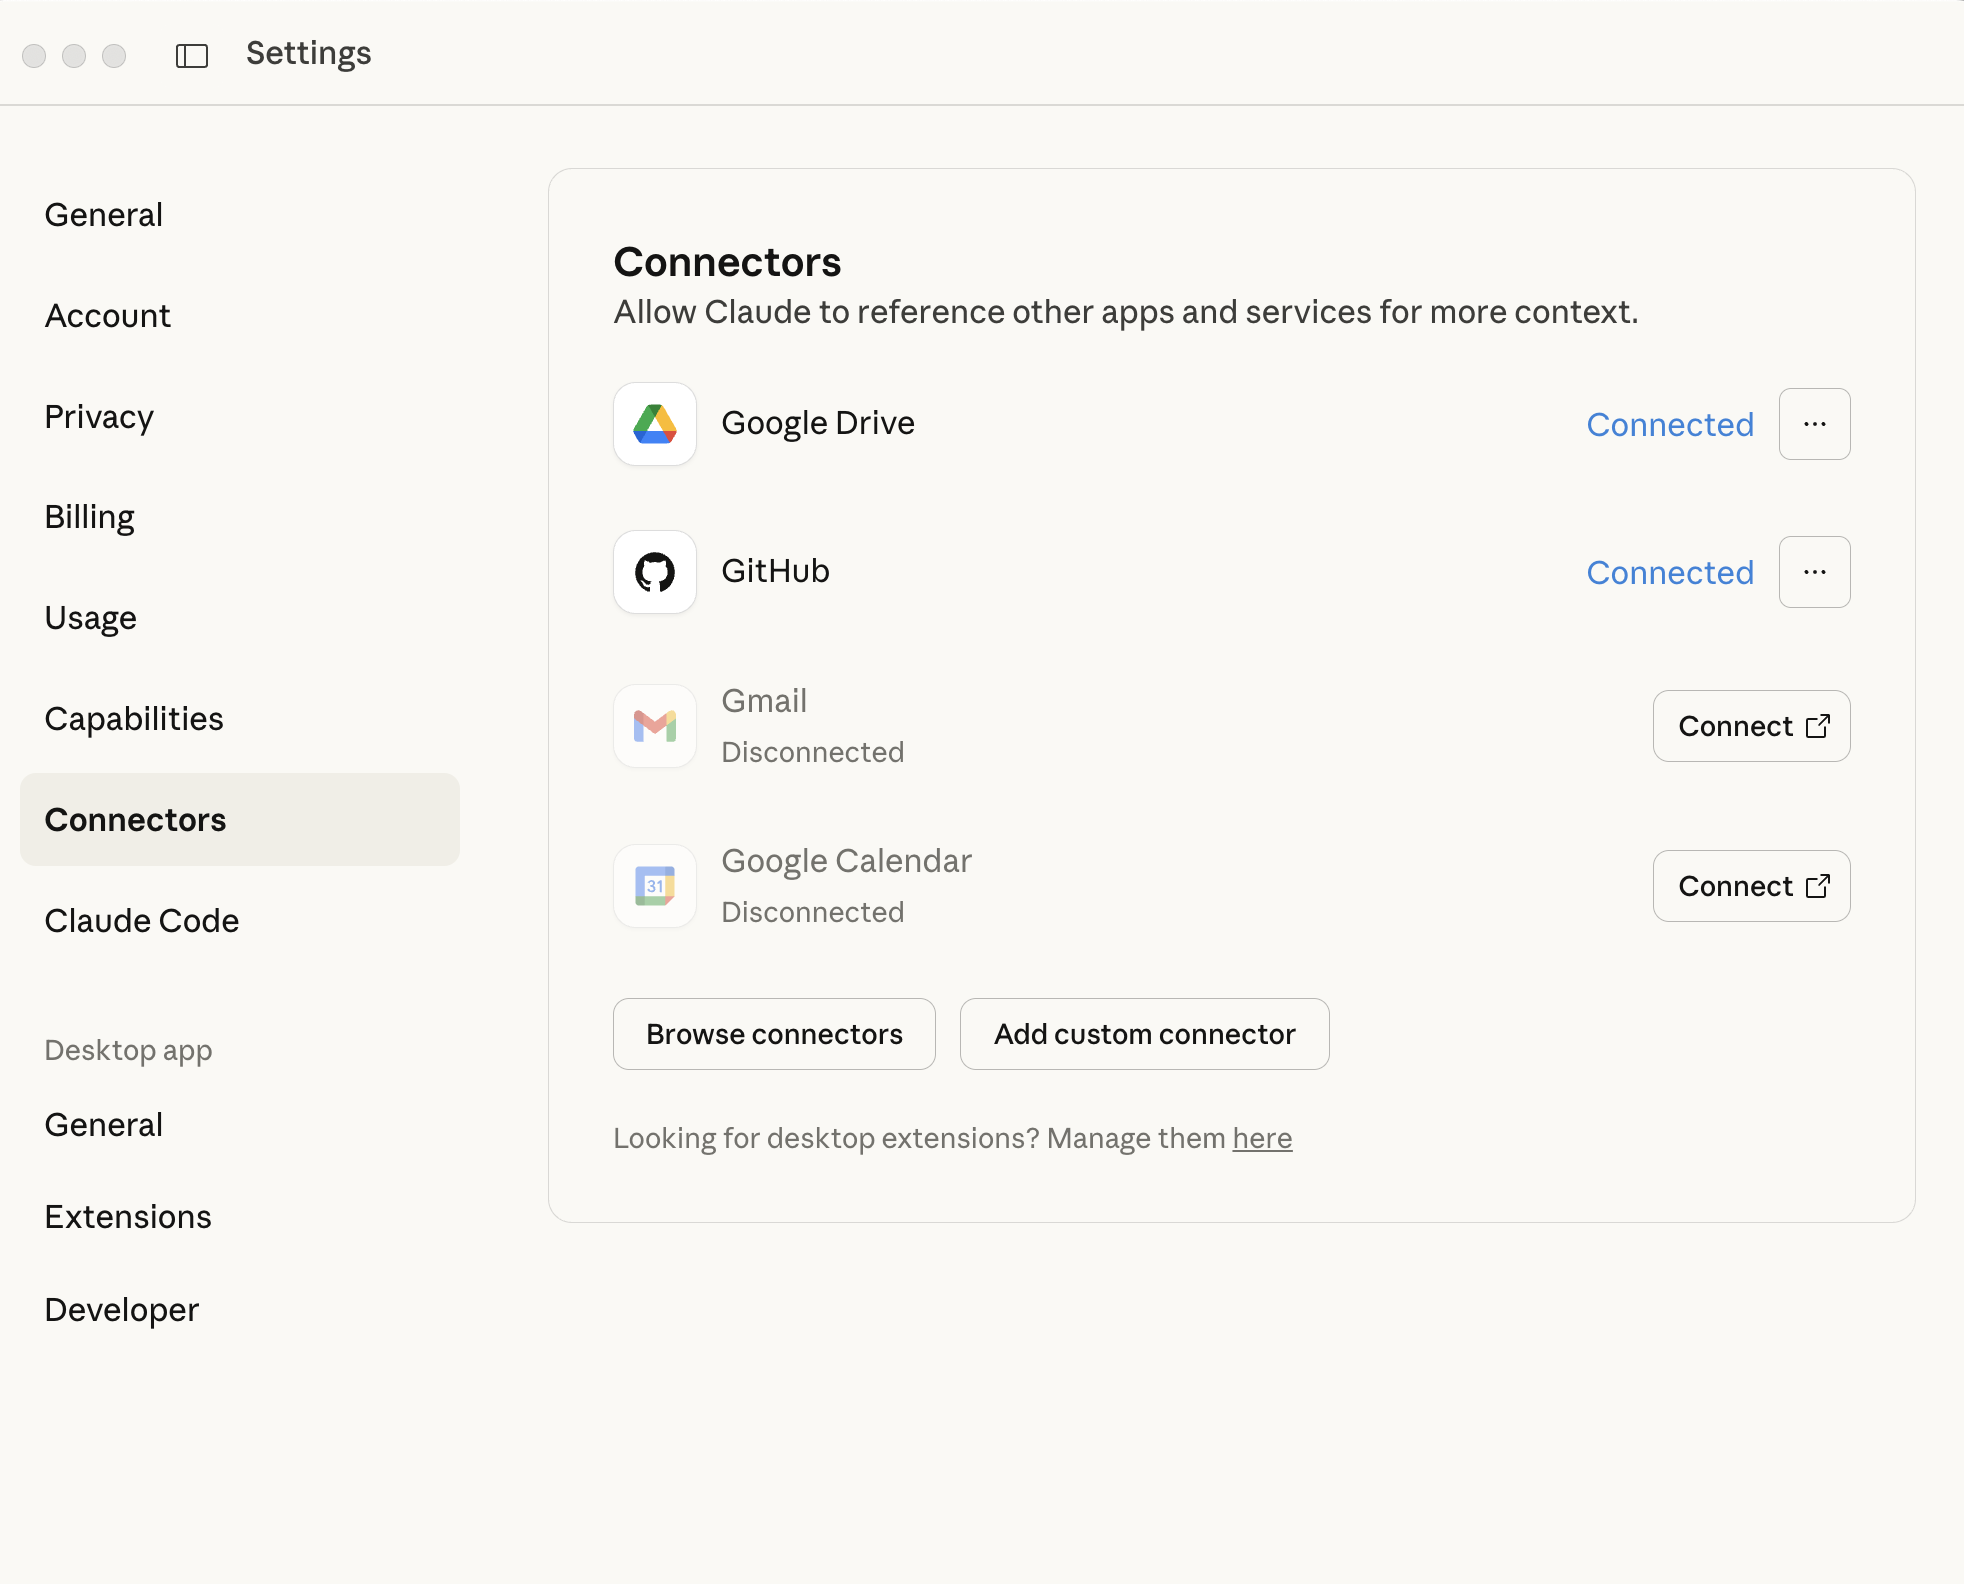
Add Custom Connector
Click Add custom connector
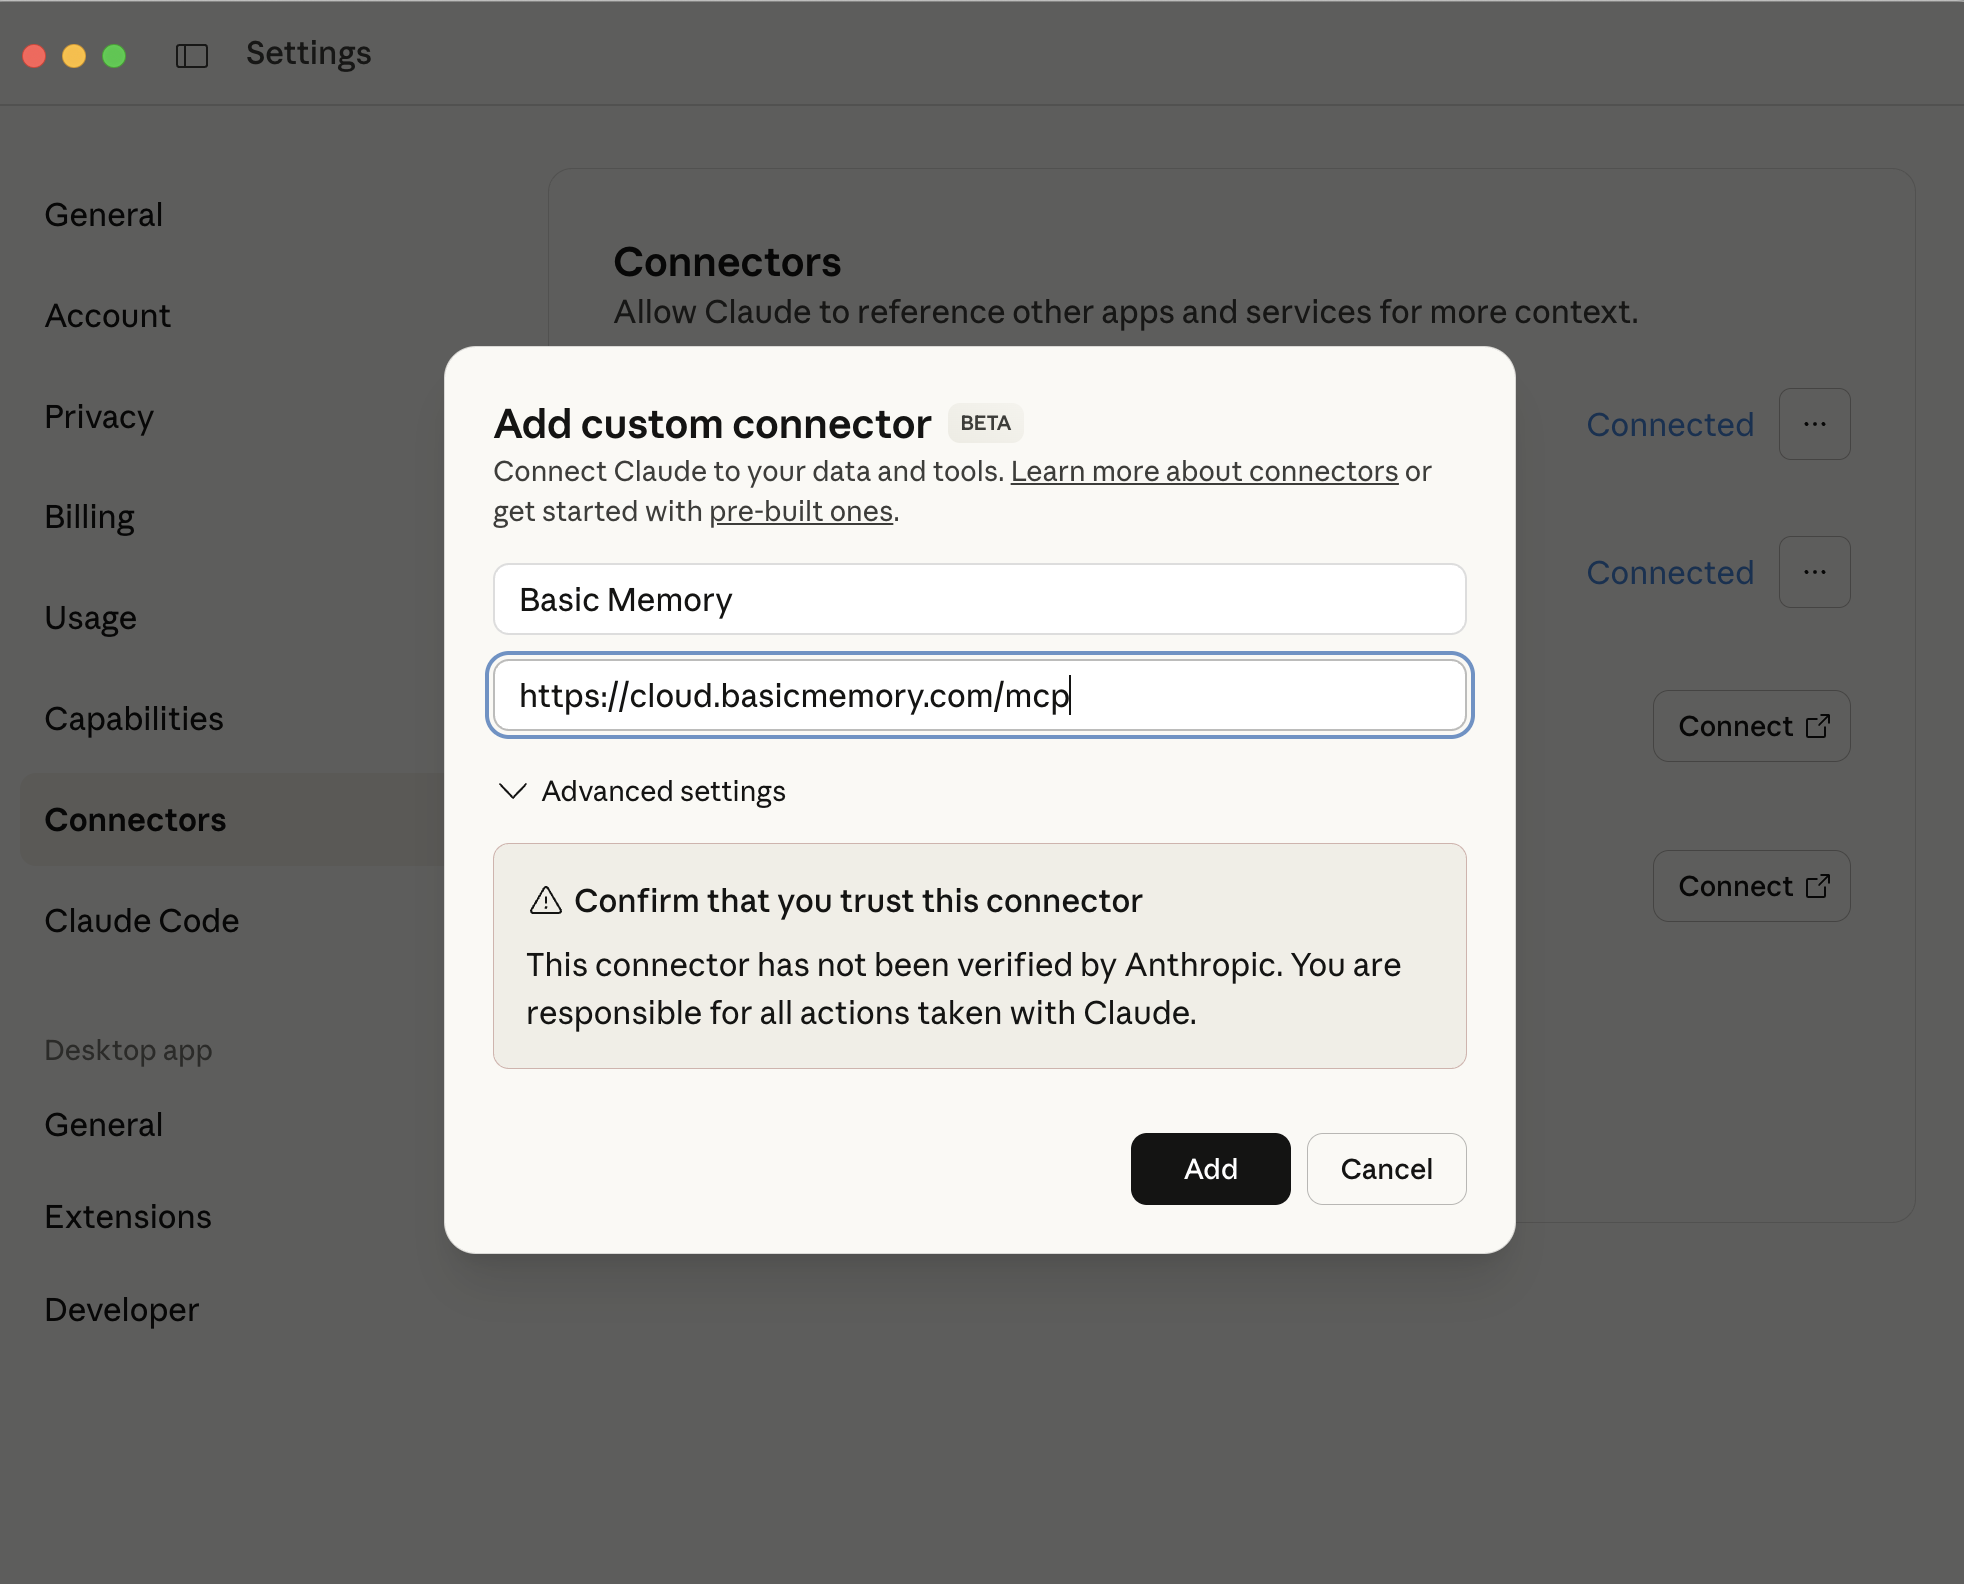
Enter the following details:
- Name: Basic Memory
- Remote MCP server URL:
https://cloud.basicmemory.com/mcp
Click Add
Authenticate
Click Connect to authenticate and grant permissions to Claude
This will open an OAuth flow to authorize Claude to access your Basic Memory Cloud account.
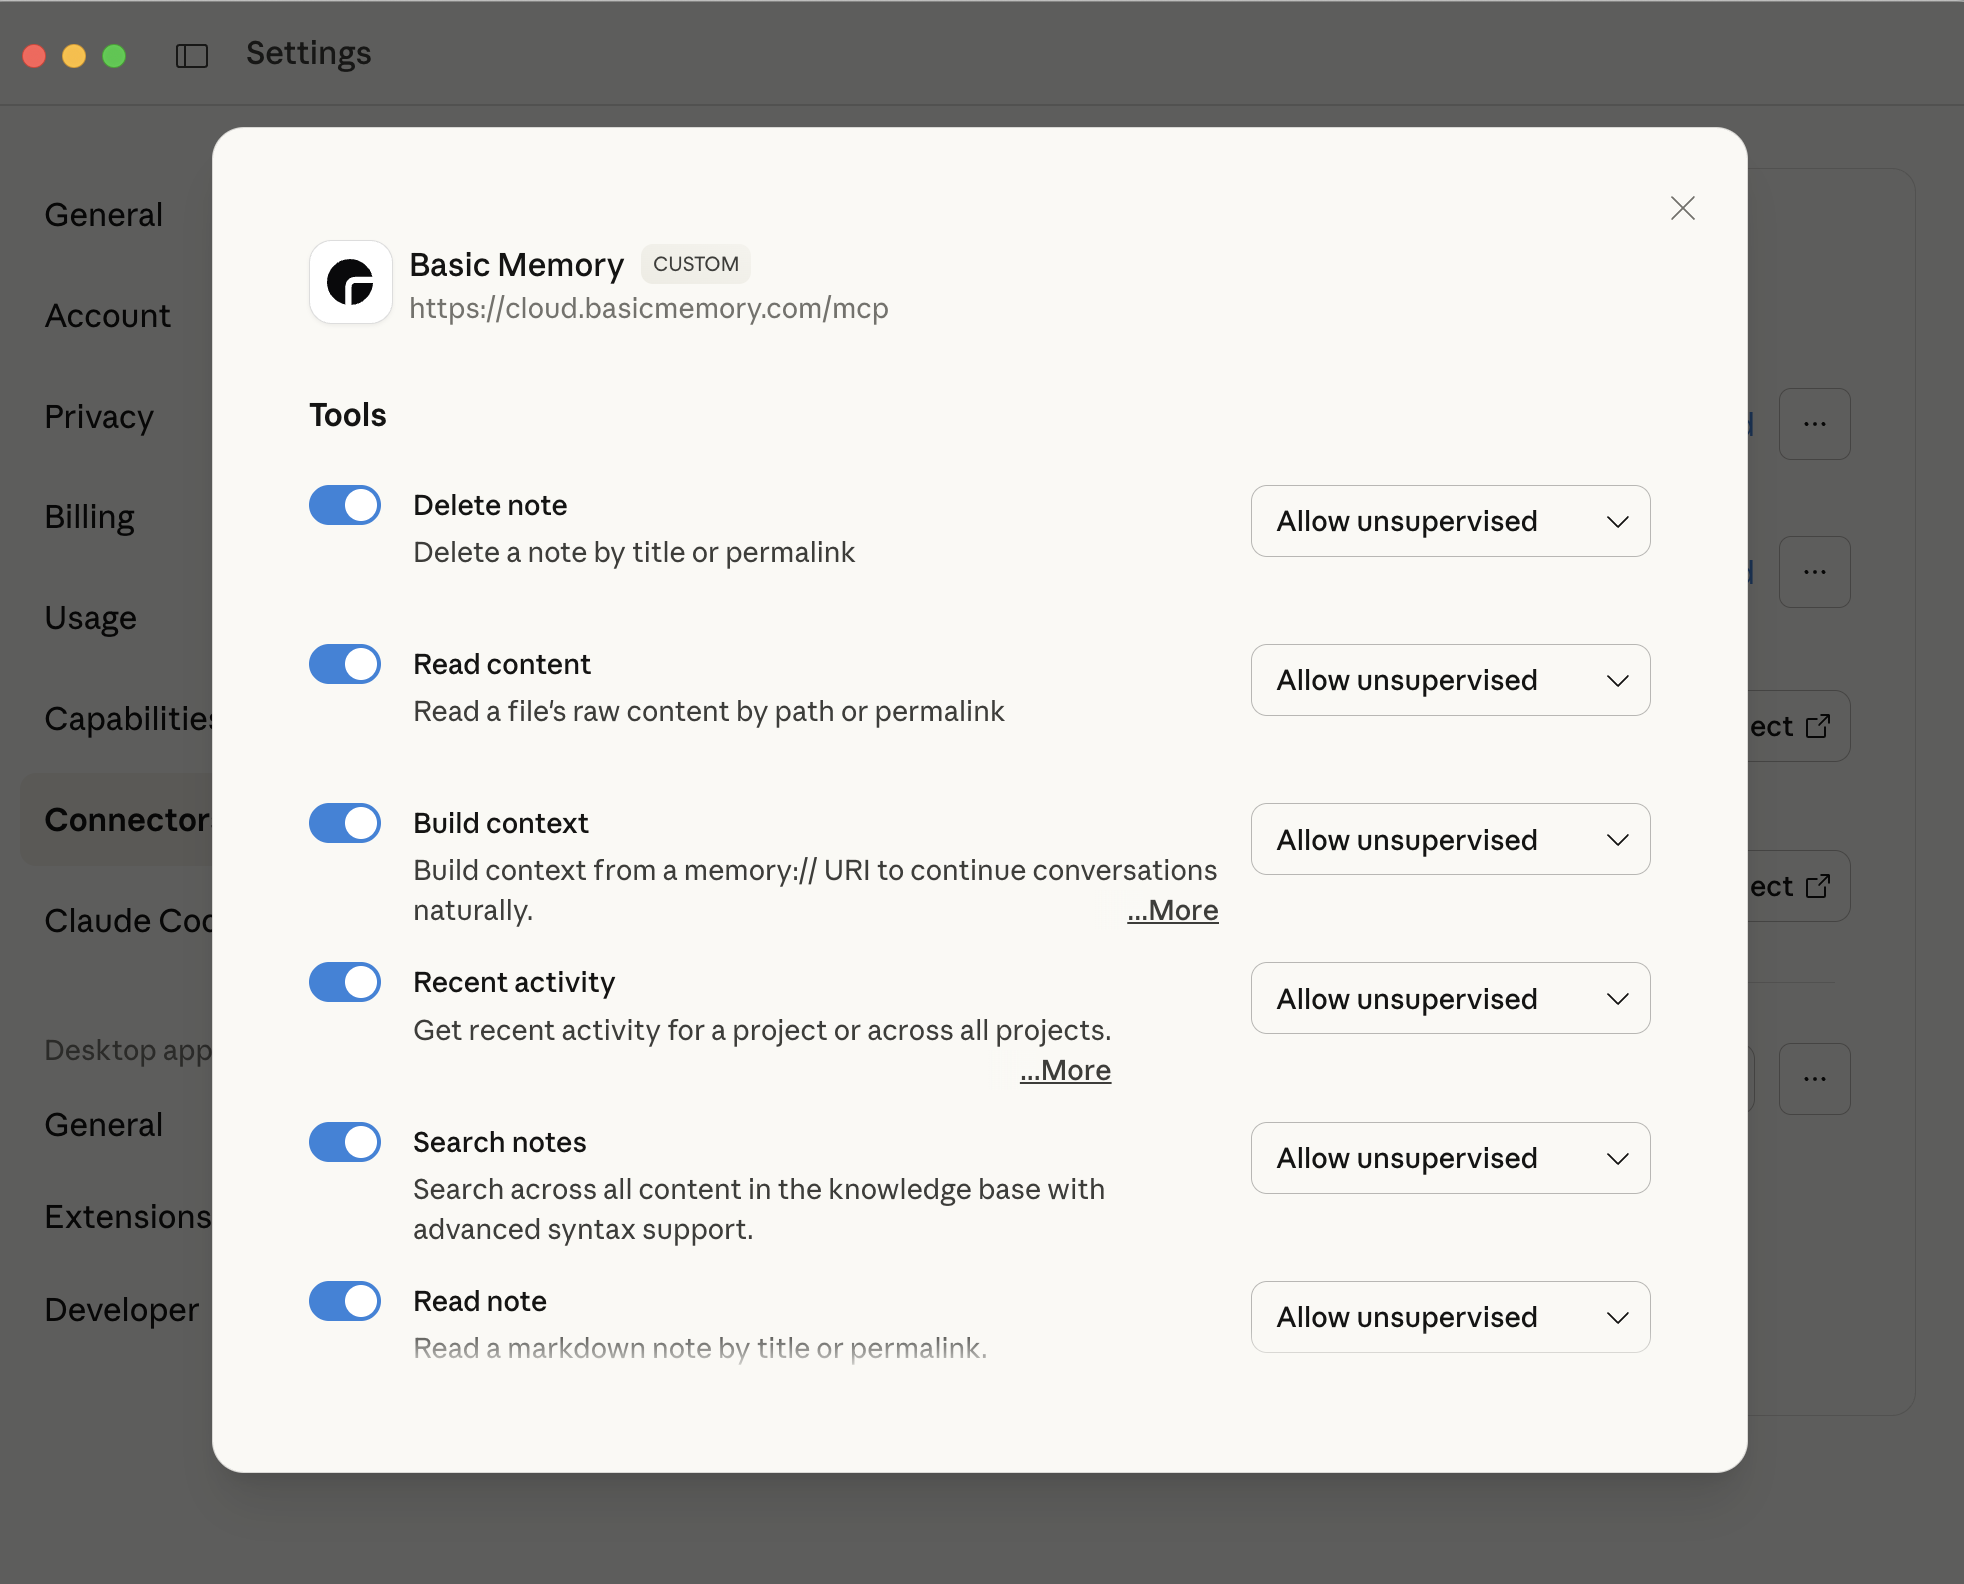
Configure Tools (Optional)
Click Configure to customize which tools are enabled
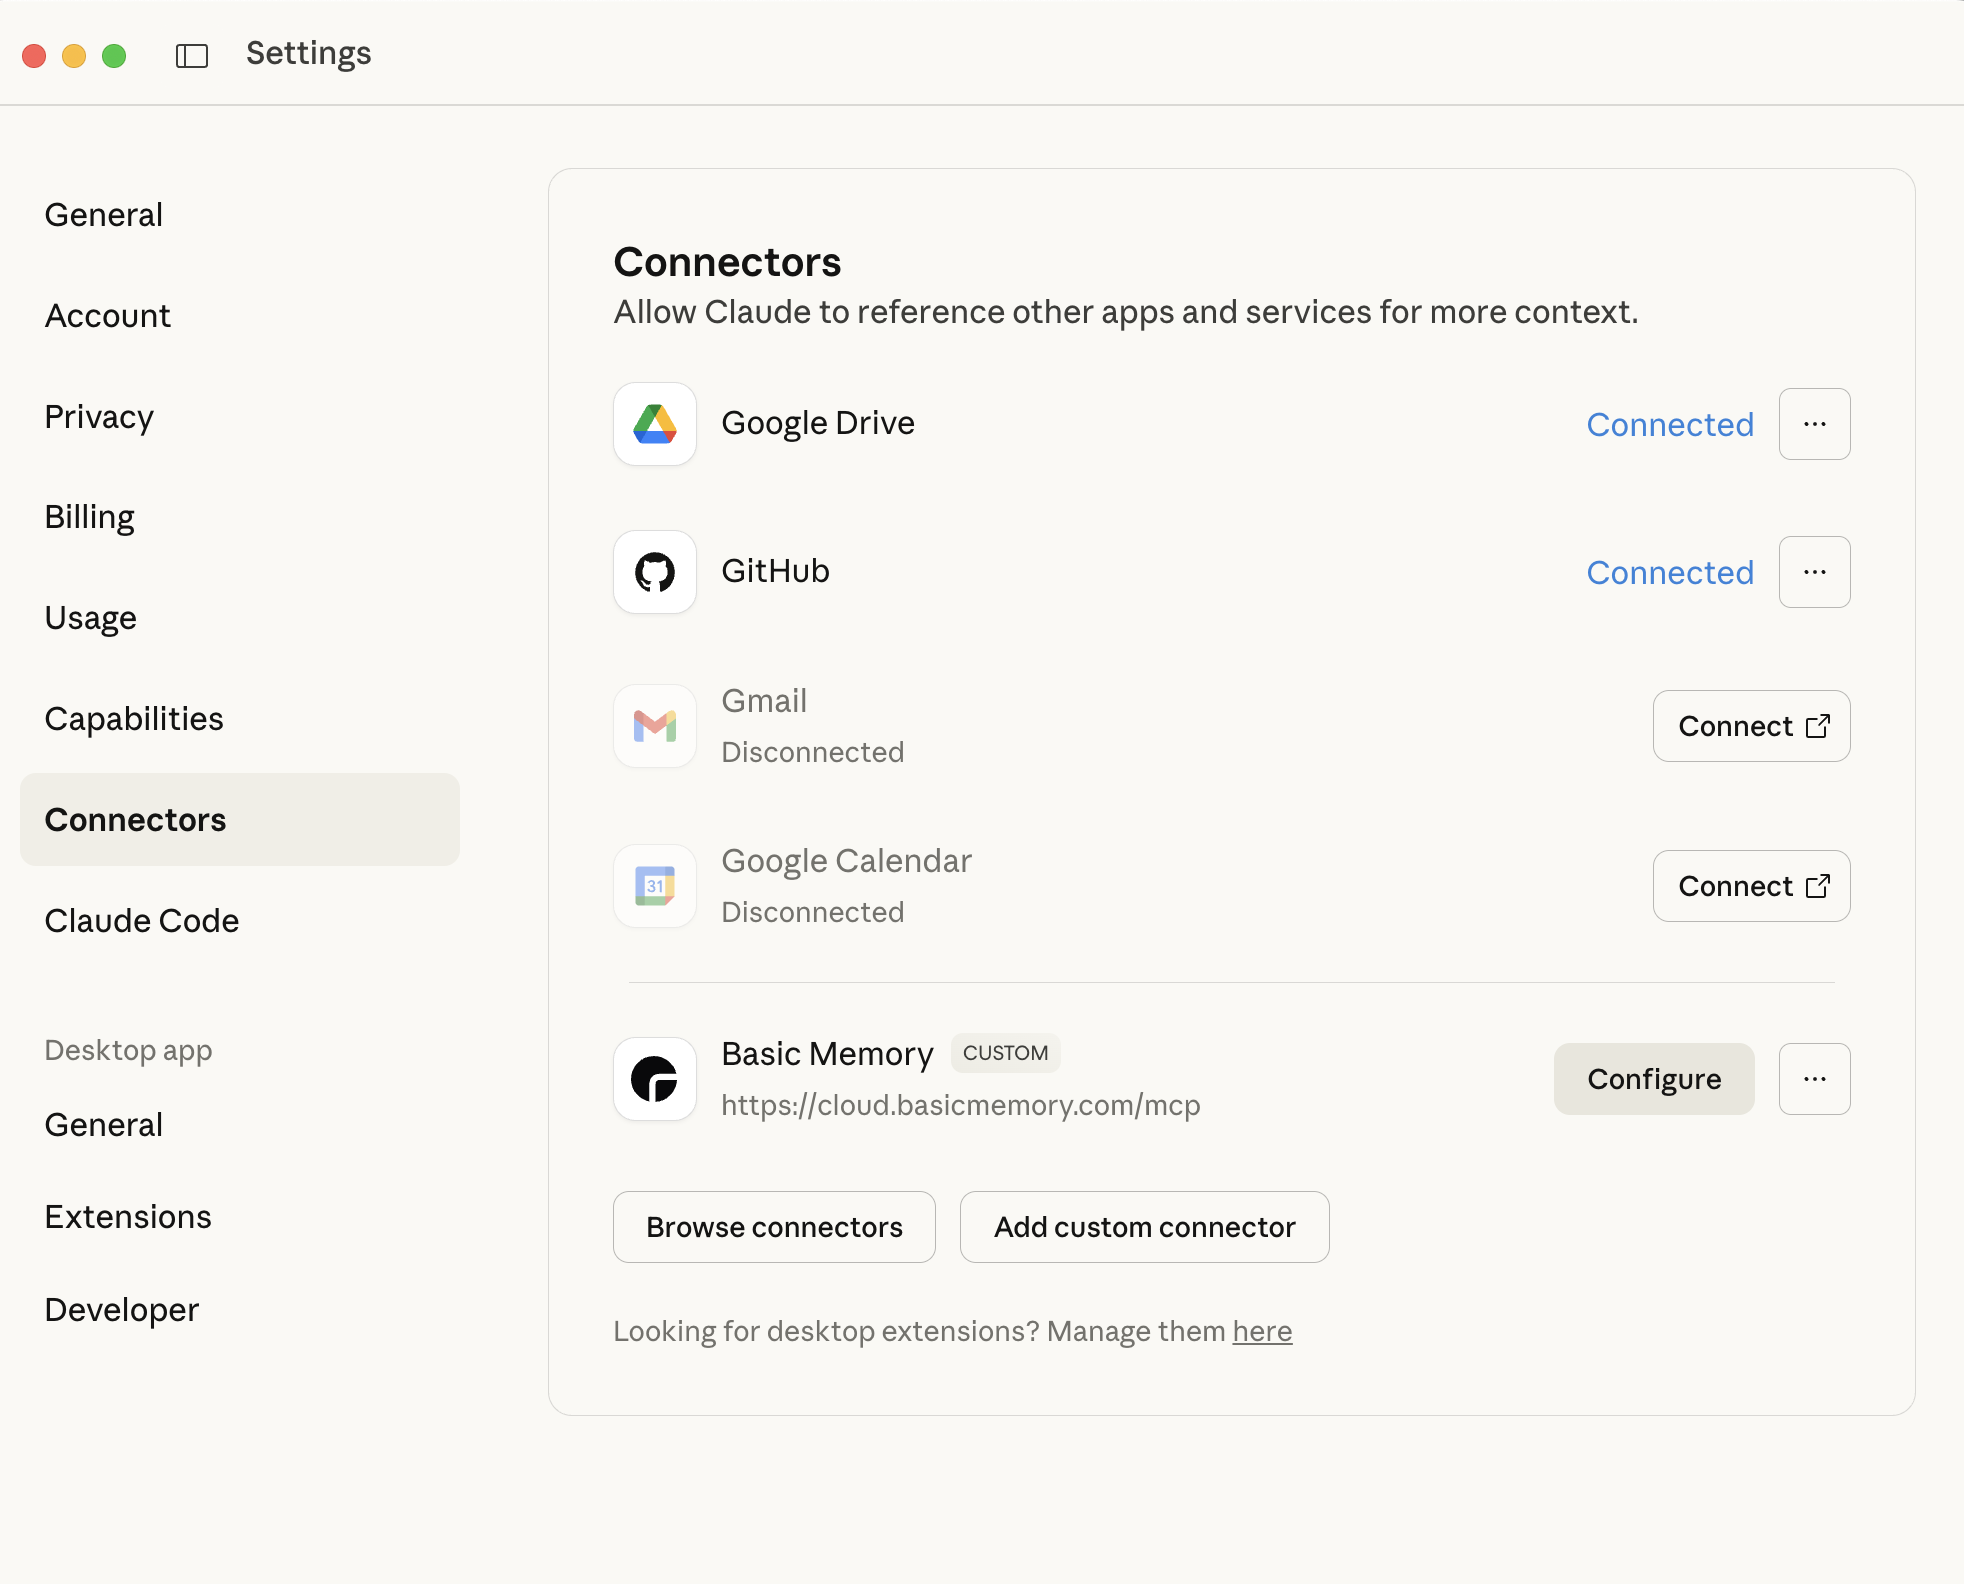
You can enable or disable specific tools and configure permissions.
Verify Setup
Confirm Basic Memory is available in the “search and tools” menu for a chat
All your notes will be saved to your cloud instance.
For detailed Claude setup instructions, see the Claude Desktop Integration guide.
Setup with ChatGPT
ChatGPT requires a Pro or Max subscription to use Remote MCP servers.
A complete setup walkthrough is shown in the following video:
For detailed ChatGPT setup instructions, see the ChatGPT Integration guide.
Web Editor
Edit and manage your cloud notes directly in your browser at app.basicmemory.com/notes.
Features
View and Edit Notes
Browse and edit all your notes with a rich markdown editor
Import Conversations
Import your ChatGPT, Claude, or JSON data directly in the browser
Manage Projects
Create, switch between, and manage multiple projects
Upload Files
Bulk upload markdown files and directories
Download Archives
Export projects as zip files for backup
Using the Web Editor
Access Notes

Switch Projects
Use the Project dropdown in the upper left corner to switch between projects
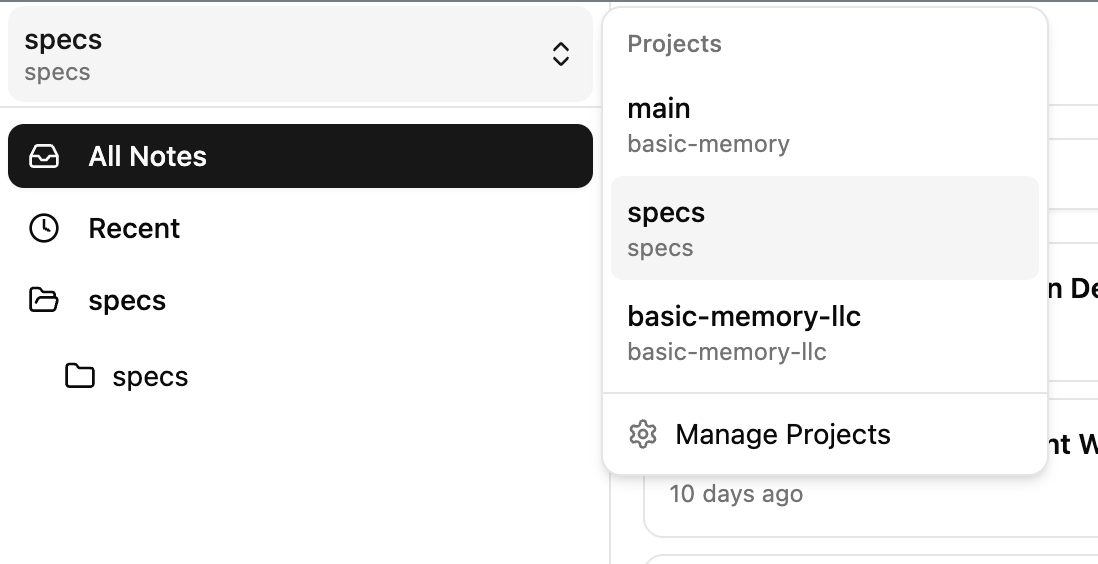
Manage Projects
Click on “Manage Projects” to access project management features
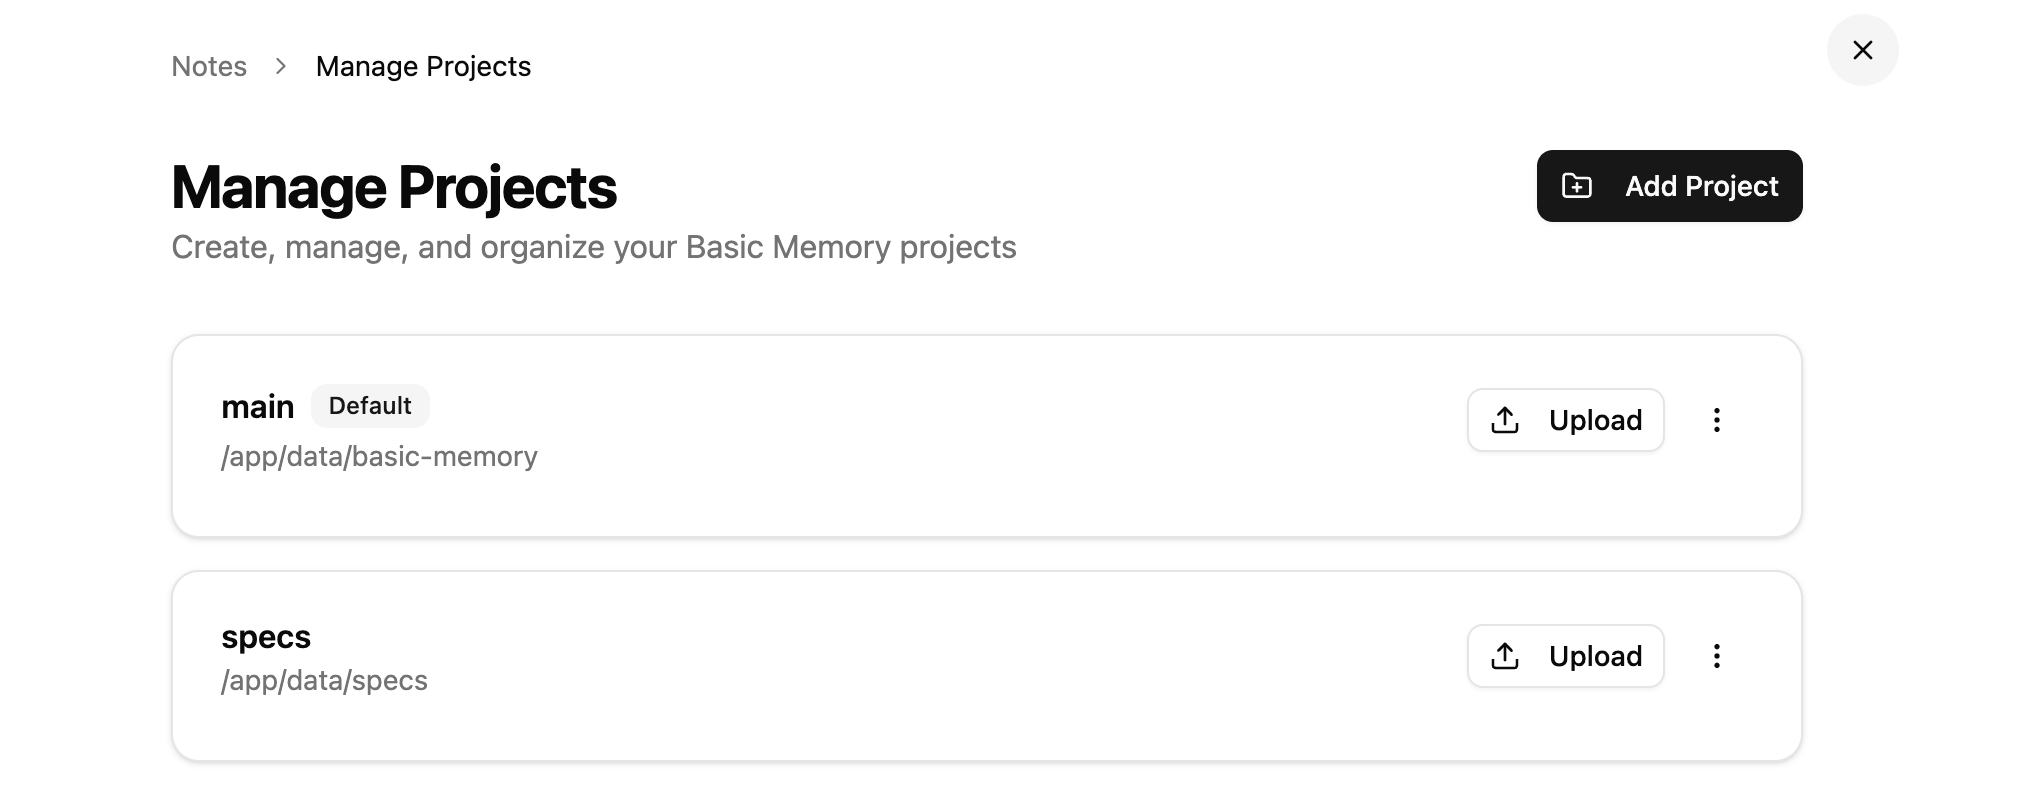
Click the “more” button (…) on any project to:
- Upload notes (files or folders)
- Download project as zip
- Delete project and its notes
Import Data
Import conversations and data from Claude, ChatGPT, or Basic Memory JSON files directly via the web interface.
Access Import Settings
In the web app, navigate to Settings → Import Data
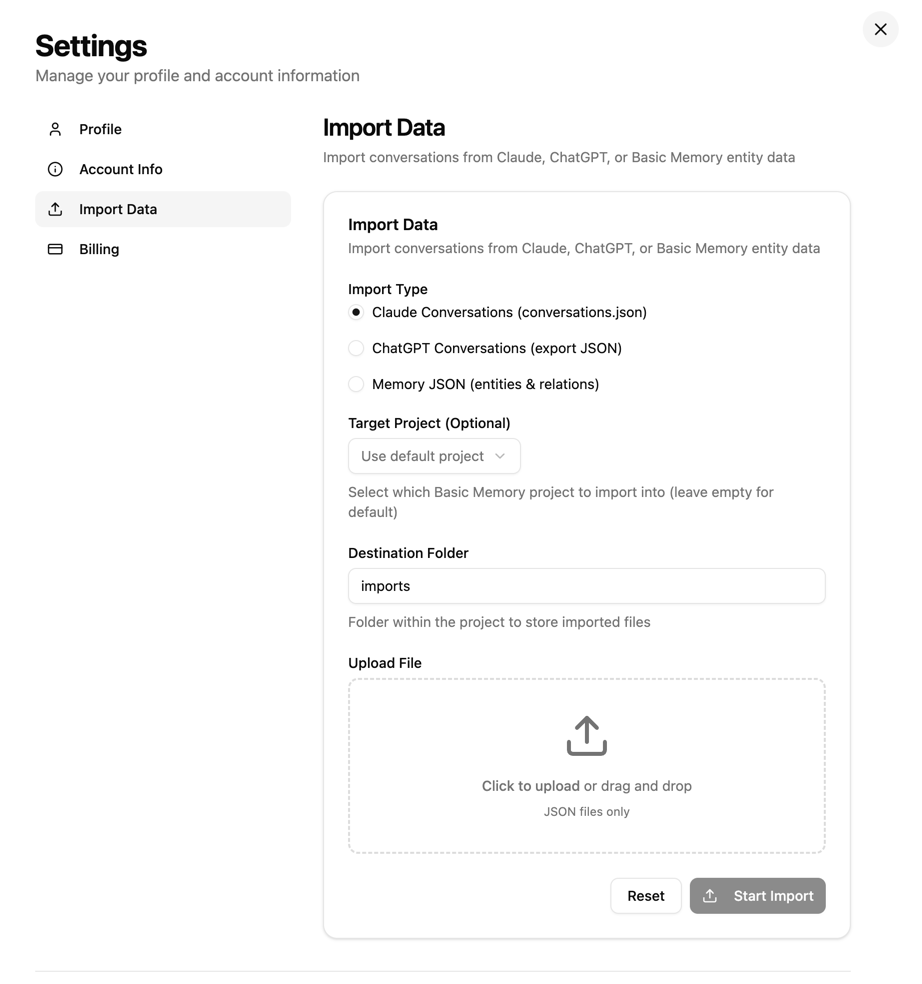
Select Import Type
Choose the type of data to import:
- Claude Conversations (conversations.json)
- ChatGPT Conversations (export JSON)
- Memory JSON (entities & relations)
Choose Target Project (Optional)
Select which project to import into, or leave empty to use the default project
Set Destination Folder
Specify the folder within the project to store imported files (default: imports)
Upload File
Click to upload or drag and drop your JSON file, then click Start Import
The import feature supports the same formats as the CLI import command. All imported conversations are converted to Basic Memory’s markdown knowledge format.
Command Line Tools
The CLI tools are optional but enable advanced features like project management, file upload, and bidirectional sync.
Requirements: Basic Memory CLI v0.16.0 or later. See install and upgrade instructions on the Getting Started page.
Why use the CLI?
- Manage multiple projects from terminal
- Upload entire folders to cloud
- Set up bidirectional sync with local files
- Automate workflows with scripts
Authenticate
bm cloud loginOpens browser for OAuth 2.1 authentication, then displays an authorization code.
Check Status
bm cloud statusView your authentication status, subscription, and cloud project information.
List Projects
bm project listShows all your cloud projects with their paths and default status.
Authentication
Basic Memory uses JWT-based cloud authentication with OAuth 2.1 and automatic subscription validation.
Login to Cloud
Authenticate with Basic Memory Cloud:
bm cloud loginWhat happens:
- Opens browser to OAuth authorization page
- Handles PKCE challenge/response automatically
- Validates active subscription status
- Stores JWT token in
~/.basic-memory/basic-memory-cloud.json - Token automatically refreshed when needed
Browser Confirmation Code
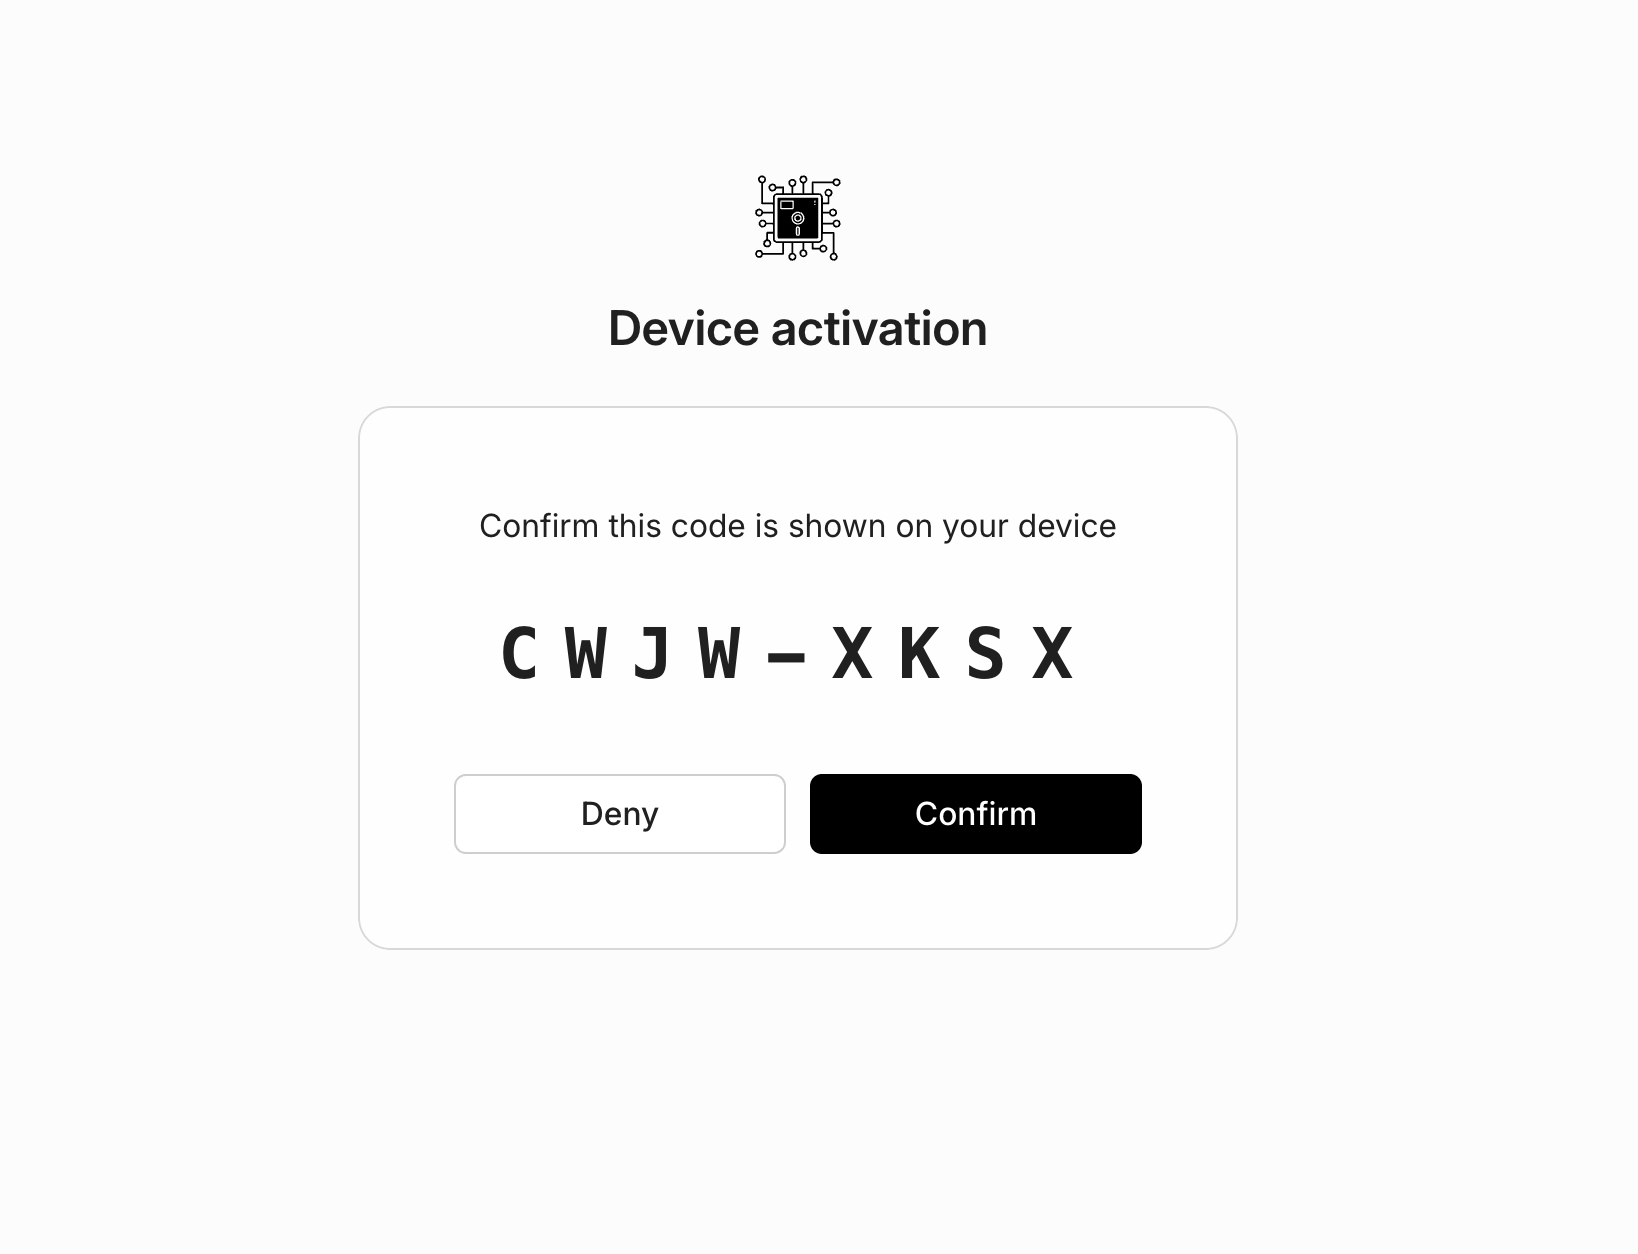
Terminal
In the terminal, the same code will be displayed. Confirm the codes match and press the Confirm button on the web page.
 bm cloud login
Initiating authentication...

🔐 Authentication Required

To authenticate, please visit:
https://eloquent-lotus-05.authkit.app/device

And enter this code: XXX-XXX

Or for one-click access, visit:
https://eloquent-lotus-05.authkit.app/device?user_code=XXX-XXX

Opening browser automatically...

Waiting for you to complete authentication in your browser...
After you login and confirm via the web browser, your auth token will be saved locally.
✅ Successfully authenticated with Basic Memory Cloud!
Verifying subscription access...
✓ Cloud mode enabled
All CLI commands now work against https://cloud.basicmemory.com
✓ Tokens saved to ~/.basic-memory/basic-memory-cloud.json
Important: After bm cloud login, CLI tools access cloud endpoints instead of local MCP. Commands like bm project list show cloud projects, and bm tool [name] invokes tools in the cloud. Use the same CLI commands for
both local and cloud projects.
If no subscription:
Active subscription required
Subscribe at: https://basicmemory.com/subscribe
Check Authentication Status
View current authentication and cloud status:
bm cloud statusOutput shows:
- Authentication status (logged in/out)
- Subscription status (active/expired)
- Last sync time
- Cloud project count
- Tenant information
- Sync directory configuration
Logout
Clear authentication session:
bm cloud logoutRemoves ~/.basic-memory/basic-memory-cloud.json and clears cached credentials. All cloud commands will require re-authentication.
Project Management
Create and manage projects from the command line:
# Create a new cloud project
bm project add my-new-project

# Create and set as default
bm project add my-new-project --default

# List all cloud projects
bm project list
Example output:
           Basic Memory Projects
┏━━━━━━┳━━━━━━━━━━━━━━━━━━━━━━━━┳━━━━━━━━━┓
┃ Name ┃ Path                   ┃ Default ┃
┡━━━━━━╇━━━━━━━━━━━━━━━━━━━━━━━━╇━━━━━━━━━┩
│ main │ /app/data/basic-memory │ ✓       │
└──────┴────────────────────────┴─────────┘
For more project management commands, see bm project --help or the CLI Reference.
Upload files to Cloud Projects
You can directly upload local files or directories to cloud projects using bm cloud upload. This is useful for:
- Migrating existing local projects to the cloud
- Quickly uploading specific files or directories
- One-time bulk uploads without setting up sync
Basic Usage:
# Upload a directory to existing project
bm cloud upload ~/my-notes --project research

# Upload a single file
bm cloud upload important-doc.md --project research
Create Project On-the-Fly:
If the target project doesn’t exist yet, use --create-project:
# Upload and create project in one step
bm cloud upload ~/local-project --project new-research --create-project
Skip Automatic Sync:
By default, the command syncs the project after upload to index the files. To skip this:
# Upload without triggering sync
bm cloud upload ~/bulk-data --project archives --no-sync
File Filtering:
The upload command respects .bmignore and .gitignore patterns, automatically excluding:
- Hidden files (
.git,.DS_Store) - Build artifacts (
node_modules,__pycache__) - Database files (
*.db,*.db-wal) - Environment files (
.env)
To customize what gets uploaded, edit ~/.basic-memory/.bmignore.
Complete Example:
# 1. Login to cloud
bm cloud login
# 2. Upload local project (creates project if needed)
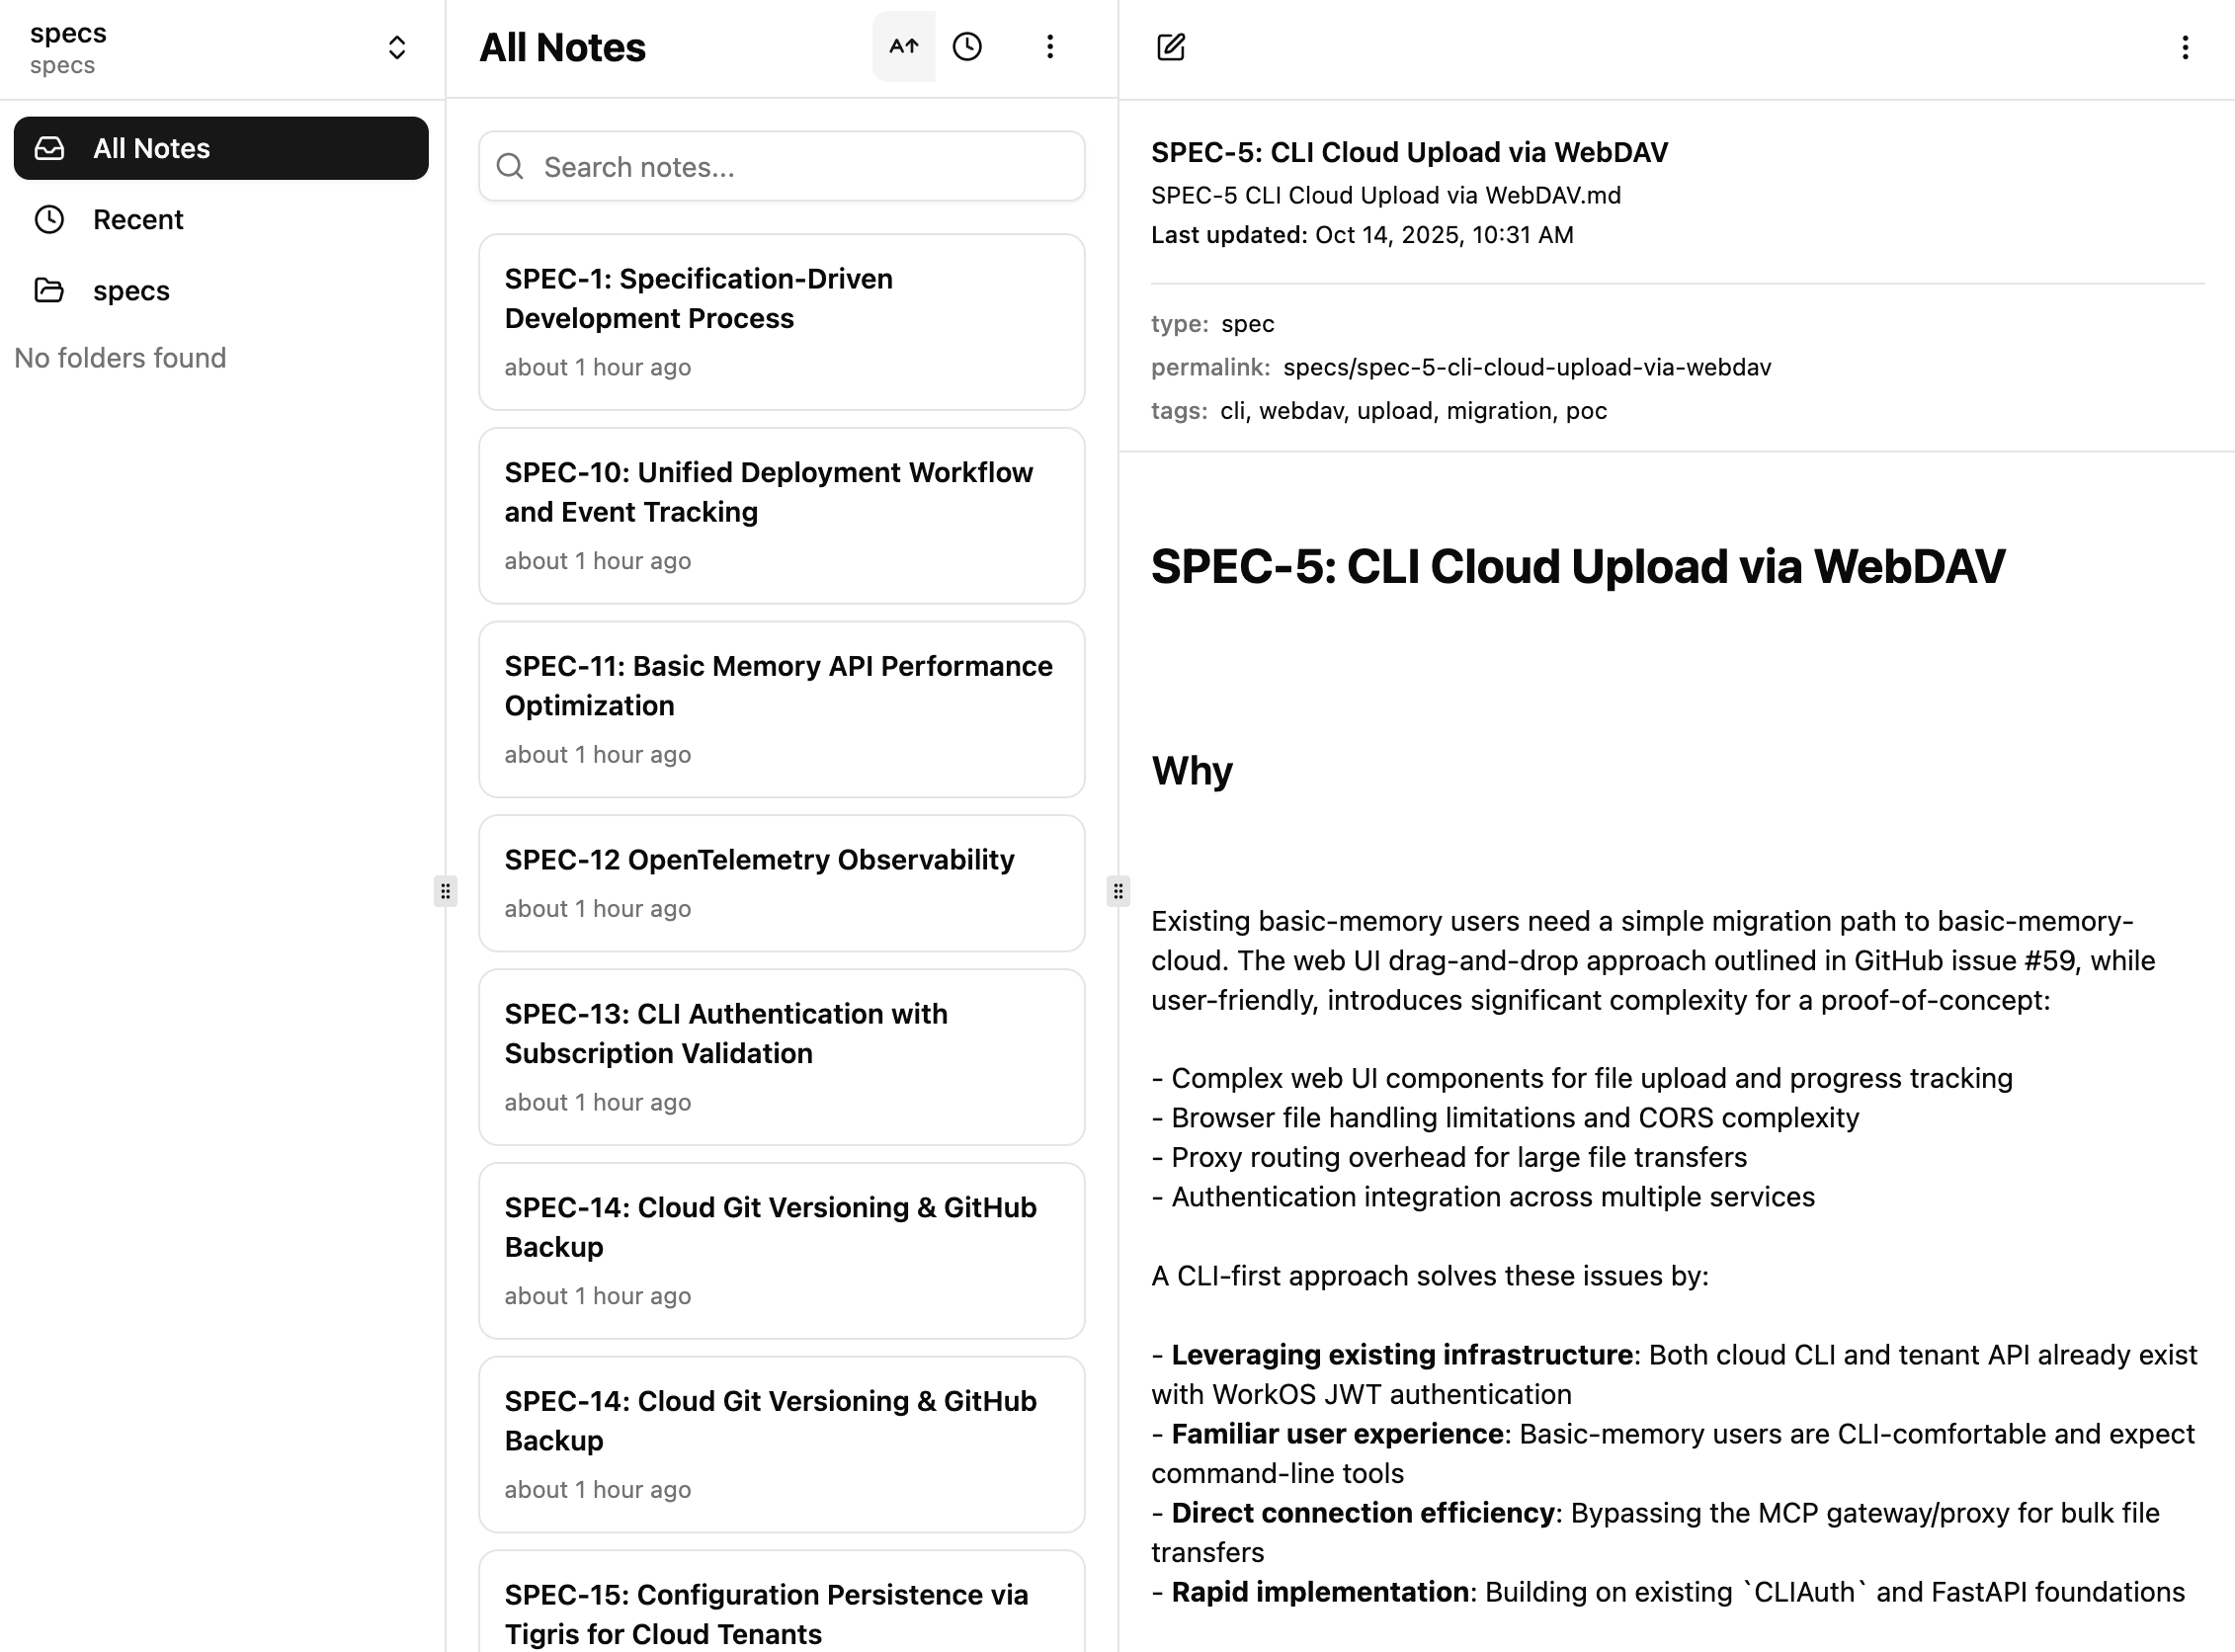
bm cloud upload ~/specs --project specs --create-project
# 3. Verify upload
bm project listExample Output:
bm cloud upload --project specs --create-project specs
Creating cloud project 'specs'...
✓ Created project 'specs'
Uploading /Users/phernandez/dev/basicmachines/basic-memory/specs to project 'specs'...
Found 21 file(s) to upload
Uploading SPEC-8 TigrisFS Integration.md (1/21)
Uploading SPEC-14 Cloud Git Versioning & GitHub Backup.md (2/21)
Uploading SPEC-9 Signed Header Tenant Information.md (3/21)
Uploading SPEC-12 OpenTelemetry Observability.md (4/21)
Uploading SPEC-15 Configuration Persistence via Tigris for Cloud Tenants.md (5/21)
Uploading SPEC-3 Agent Definitions.md (6/21)
Uploading SPEC-9 Multi-Project Bidirectional Sync Architecture.md (7/21)
Uploading SPEC-5 CLI Cloud Upload via WebDAV.md (8/21)
Uploading SPEC-13 CLI Authentication with Subscription Validation.md (9/21)
Uploading SPEC-17 Semantic Search with ChromaDB.md (10/21)
Uploading SPEC-14- Cloud Git Versioning & GitHub Backup.md (11/21)
Uploading SPEC-9-1 Follow-Ups- Conflict, Sync, and Observability.md (12/21)
Uploading SPEC-10 Unified Deployment Workflow and Event Tracking.md (13/21)
Uploading SPEC-4 Notes Web UI Component Architecture.md (14/21)
Uploading SPEC-7 POC to spike Tigris Turso for local access to cloud data.md (15/21)
Uploading SPEC-2 Slash Commands Reference.md (16/21)
Uploading SPEC-18 AI Memory Management Tool.md (17/21)
Uploading SPEC-1 Specification-Driven Development Process.md (18/21)
Uploading SPEC-11 Basic Memory API Performance Optimization.md (19/21)
Uploading SPEC-6 Explicit Project Parameter Architecture.md (20/21)
Uploading SPEC-16 MCP Cloud Service Consolidation.md (21/21)
✓ Upload complete: 21 file(s) (363.9 KB)
✅ Successfully uploaded to 'specs'
Syncing project 'specs'...
✓ Filesystem sync initiated for project 'specs'
After sync completes, the notes are available in the Notes Web Editor and for AI conversations.
For bidirectional sync (editing both locally and in cloud), see the Cloud Sync Guide.
Migrating to Cloud
Already using Basic Memory locally? You have two options to move your notes to the cloud:
Option 1: One-Time Upload (Fastest)
Upload your existing local project to cloud:
# Login first
bm cloud login

# Upload entire project
bm cloud upload ~/basic-memory --project main --create-project
Use when:
- You want to move to cloud-only
- One-time migration is sufficient
- Don’t need ongoing local-cloud sync
Option 2: Bidirectional Sync (Hybrid Workflow)
Set up sync to work both locally and in cloud:
# Login and setup sync
bm cloud login
bm cloud setup

# Add existing project with sync enabled
bm project add main --local-path ~/basic-memory

# Initial sync (resync creates baseline)
bm project bisync --name main --resync --dry-run  # preview first
bm project bisync --name main --resync             # establish baseline

# Ongoing sync (run after local or cloud changes)
bm project bisync --name main
Use when:
- You want to edit both locally (Obsidian, VS Code) and in cloud
- Need offline access
- Want automatic bidirectional sync
Both methods preserve all your notes, relations, and tags. Choose based on whether you want cloud-only or hybrid local+cloud workflow. See the Cloud Sync Guide for detailed sync configuration.